
Balanced Rock in Arches National Park: What You Need to Know + Tips & FAQs
This guide contains affiliate links to trusted partners.
When exploring the outdoors, I encourage you to follow Leave No Trace Principles and be respectful of where you are so we can preserve these spaces for future generations. ♥️
Planning on visiting Balanced Rock on your trip to Arches National Park?
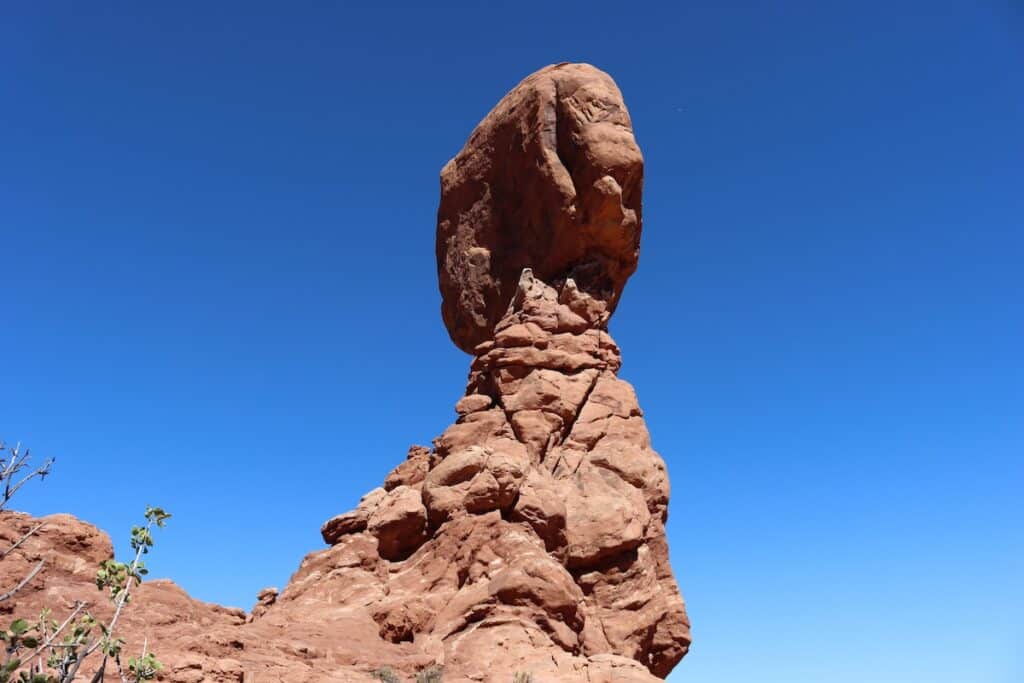
While there are plenty of iconic things to do in Arches National Park, one of the quickest and most family-friendly options is the Balanced Rock. To be honest, when Daniel and I visited, we almost missed it since it is basically a roadside attraction in the park. However, the line of cars waiting to check it out was a good indication that we should stop!
That said, knowing where it is located, how much time you should spend there, and what you are actually looking at can make your short time there a lot more interesting. Otherwise, you’re looking at a very neat-seeming rock but you’re not sure why it’s cool! Plus, dealing with the crowds and Arches’ reservation system always makes it a bit more of a challenge than just stopping by and moving on to the next thing.
In summary: This guide will cover where you can find Balanced Rock, how much time you should spend there, and some tips and FAQs to help you make the most of it.
Quick tip: If the parking lot is crowded, consider heading to another spot along the Arches Scenic Drive and coming back when the people have thinned out.
How to visit Balanced Rock
After entering the park, you have a short, 16-minute drive to Balanced Rock. Remember that you will either need to enter the park before 7:00 am or have a reservation ticket for entry in hand.
I personally recommend that you get in before reservations are required, head to the very end of the park at Devils Garden first, and then work your way back to Balanced Rock. However, you can stop there on your way farther into the park if you would like–it’s all up to you and your itinerary!
You’ll pass a few different stops along the scenic drive including the La Sal Mountains Viewpoint, Ring Arch, the Great Wall, and the Phallus Pillar. Up to you if you want to see these lesser-known formations at all or if you want to save them for another time.
Depending on the time of day, the parking lot at Balanced Rock might be pretty full since it is a highlight. You can always check out one of the other formations I mentioned above and come back when things are less busy.
You are right on the trail when you get out of your car, and you should be able to get a good picture and glimpse of Balanced Rock without walking too far. However, if you want to see it from all angles, walking along the base is the best way to see how unique this structure is!
Need help planning your national park trip?

I offer custom national park itinerary planning as a service to help you make the most of your adventures! These itineraries cover everything from where to stay, eat, what to do, and more!

Balanced Rock trail
If you are up for a very short walk, there is a trail that hugs the base of Balanced Rock. At 0.3 miles and 55 feet of elevation gain, it’s pretty doable for almost everyone and is a great option for young kids. It also gives you a nice overlook of Balanced Rock instead of being right underneath it the whole time, which definitely makes for better photo opportunities.
If you plan on adding this hike, then you will be spending more like 20 minutes at Balanced Rock than 10 minutes if you just explore the base. It doesn’t add a ton of time, but just something to keep in mind if you are on a tight schedule and you only have one day in Arches!
Join the community! Love the outdoors? Join my free Facebook community where we chat and share information about national parks, hiking, outdoor activities, and more! JOIN HERE!
Tips for visiting Balanced Rock
Here are some tips I found helpful for when I visited Balanced Rock and some recommendations to make it enjoyable for you!
- Wear good footwear: While you don’t need hiking boots or anything too rugged, it doesn’t hurt to wear closed-toe sneakers or shoes–especially if you are planning on doing the short trail. Rocks can get in your sandals and make it uncomforable.
- Look for cairns: On most trails, cairns aren’t great since they are built by those who don’t understand what they are for. However, these were created by the Park Service and are used to mark the trail.
- Check out The Windows nearby: The Windows area of Arches is often overlooked and offers some really unique-looking formations. It’s another great stop if you want to wait for crowds to clear a little at Balanced Rock.
Balanced Rock FAQs
Here are some commonly-asked questions I get from clients or readers looking for more info on Balanced Rock.
Conclusion
I hope this guide has helped you plan your short trip to Balanced Rock. To be honest, I thought the experience would be overrated, but I had a total appreciation for it once I was able to walk around the base for myself. Regardless, it’s such a quick stop that even if you don’t think you’ll be impressed, I recommend checking it out so you can form your own opinion!
Have any questions for me about visiting Balanced Rock? Let me know in the comments!
National Park essentials
You’ll need to enter: National parks pass 🎟️
Document your trip: National parks journal ✏️
Wear your national parks love: National parks shirts 👕


