
Hiking to Emerald Lake, CO: What You Need to Know + Tips & FAQs
This guide contains affiliate links to trusted partners.
When exploring the outdoors, I encourage you to follow Leave No Trace Principles and be respectful of where you are so we can preserve these spaces for future generations. ♥️
Planning on taking on the Emerald Lake hike in Rocky Mountain National Park?
One hike Daniel and I wanted to make sure not to miss when we visited Rocky Mountain National Park was the Emerald Lake hike. While we have made it back a few times, this hike still remains one of my favorites–there’s a reason that it consistently tops the list of the best hikes in the park!
While the hike itself might not be the most difficult, getting the required reservations and getting a parking spot can be more of a challenge. Even when we have gotten there very early, sometimes we still have trouble finding a place to park our car. It’s also a very popular trail, meaning you will be sharing it with a bunch of people no matter what time of day or year you take it on.
This guide will cover everything you need to know about hiking to Emerald Lake, as well as some personal tips I found helpful when headed out on the trail. This is a can’t-miss activity in Rocky Mountain for sure!
In summary: This guide covers everything you need to know about taking on the Emerald Lake hike in Rocky Mountain National Park, including tips and FAQs to help you make the most of it.
Quick tip: I would highly recommend this hike during the fall months. Not only is it beautiful, but there are likely to be fewer people on the trail!
Quick stats
Distance: 3.2 miles
Difficulty: Moderate
Elevation gain: 702 feet
Time on trail: 1 hour and 30 minutes
How to hike to Emerald Lake
First things first–let’s talk about getting to the trailhead. The hike starts at the Bear Lake Trailhead, which is one of the most popular spots in the park. During peak season, you’ll need a timed entry reservation to access the Bear Lake Road Corridor between 5:00 am and 6:00 pm. I highly recommend booking these as soon as they become available–they go fast!
You’ll find the Bear Lake parking lot at the very end of Bear Lake Road. Since this is such a popular trail, I recommend arriving early (like, really early). Daniel and I got there around 6:30 am on a summer weekday and the lot was already filling up. If you can’t snag a spot in the main lot, you can park at the Park & Ride and take the free Rocky Mountain National Park shuttle–it runs frequently and drops you right at the trailhead.
The trail starts at an elevation of 9,475 feet, and you’ll definitely feel it if you’re not used to the altitude. Take it slow and bring plenty of water–the elevation gain is no joke, even though the distance isn’t too long. The path is well-marked and maintained, starting out paved and then transitioning to a dirt trail.
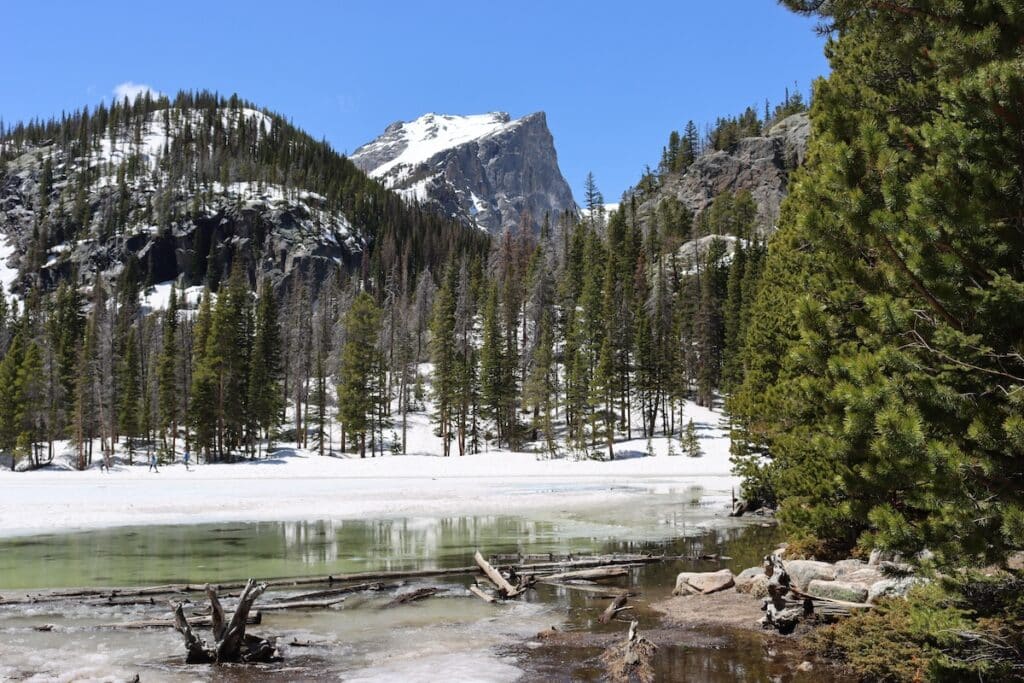
Your first stop will be Nymph Lake, about 0.5 miles from the trailhead. This is a charming little lake with lily pads dotting the surface during summer months. It’s a great spot for photos before you head to the main attraction. The trail climbs steadily through a lovely forest of pine and aspen trees to reach this first landmark.
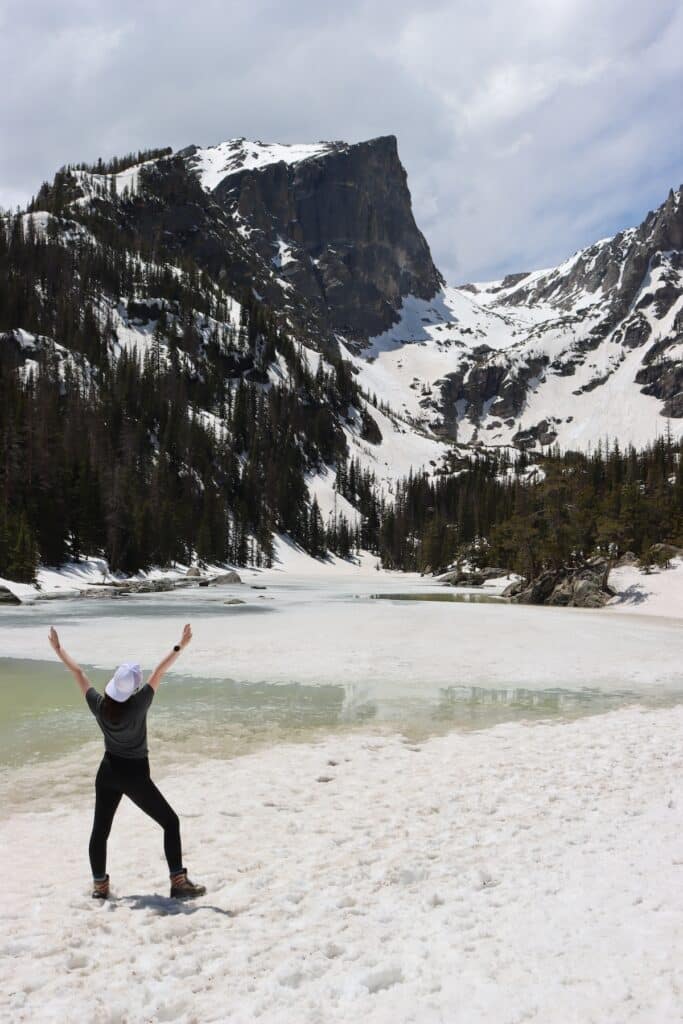
Continuing upward, you’ll reach Dream Lake after about a mile. This was honestly one of the most picturesque spots I’ve seen in Rocky Mountain National Park. The way Hallett Peak reflects in the crystal-clear water is absolutely stunning. There are some great rocks along the shore that make perfect rest spots–we took a quick break here to have some trail mix and take in the views.
The final push to Emerald Lake is the most challenging part of the hike. You’ll gain elevation pretty quickly, and depending on the season, you might encounter some snow and ice even in summer months. When we hiked this in July, there were still some snowy patches near Emerald Lake. Trekking poles can be really helpful here, especially on the descent.
After 1.8 miles of hiking, you’ll reach Emerald Lake, sitting at 10,110 feet. That first view of the emerald-green water surrounded by jagged peaks is absolutely worth every step! Hallett Peak and Flattop Mountain create this incredible backdrop that just begs to be photographed. The lake gets its stunning color from rock flour, which is created by glacial activity.

The trail can be quite exposed at points, especially as you get higher up, so bring sun protection even if you’re starting early. We’ve learned the hard way that mountain weather can change quickly–I always pack layers, even in summer. The wind can be pretty intense around the lakes, so a windbreaker is a good idea too. I also recommend avoiding the afternoon hours since this is when summer rainstorms tend to roll in.
If you’re visiting in winter, the trail is still accessible but you’ll definitely need microspikes or snowshoes. The lakes freeze over and the landscape transforms into this incredible winter wonderland. Just be prepared for much colder temperatures and check avalanche conditions before you go. Also, don’t expect the snow to melt until the end of June at the earliest!
On your return trip, you’ll follow the same trail back to Bear Lake. The descent offers some different perspectives of the landscape, and if you started early, you might notice how much busier the trail has gotten. This is definitely one of those hikes where an early start makes a huge difference in terms of both parking and trail congestion.
Need help planning your national park trip?

I offer custom national park itinerary planning as a service to help you make the most of your adventures! These itineraries cover everything from where to stay, eat, what to do, and more!
Map of the Emerald Lake hike

Join the community! Love the outdoors? Join my free Facebook community where we chat and share information about national parks, hiking, outdoor activities, and more! JOIN HERE!
Tips for hiking to Emerald Lake
Here are some tips I found helpful for hiking to Emerald Lake–you might find these useful too!
- Go in the middle of the week: If you can, try to avoid weekends and holidays. While the park is always busy anymore, it’s likely to be a bit quieter then.
- Bring layers: The weather you experience is likely to range from hot to cold to windy. Layers can help keep you comfortable–and always bring a rain jacket!
- Be aware of the elevation: If you are not used to hiking in high elevations, then know that it might take you a bit longer to complete this hike than others. Drink plenty of water and return to a lower elevation if you start to feel altitude sickness.
- Wear shoes with traction: You don’t need heavy-duty hiking boots, but make sure you do have some sturdy footwear that will provide you with support on the trail–flip-flops won’t cut it!
Emerald Lake FAQs
Here are some frequently-asked questions I get about Emerald Lake and the hike up there.
Conclusion
I hope this has helped you get an idea of what it is like to hike to Emerald Lake. There is a reason that this is such a popular trail for those visiting Rocky Mountain, and I definitely recommend you add it to your list of hikes when you are there. Just remember to keep the weather, altitude, and parking situation in mind so that you go into it feeling prepared.
Have any questions about hiking to Emerald Lake? Let me know in the comments!
National Park essentials
You’ll need to enter: National parks pass 🎟️
Document your trip: National parks journal ✏️
Wear your national parks love: National parks shirts 👕


